Sunday, August 31, 2014

Verdun - WW1 Bolt Action

Just a few teaser pics of a Bolt Action WW1 scenario for a game day in a few weeks. I had intended to host a Muskets and Tomahawks game, but discovered I didn't have adequate terrain for that scenario, so switched to Bolt Action instead. This is actually fortuitous as I've been wanted to try out the rules for WW1.
This large terrain piece is actually a 15/20mm piece for Monte Cassino, IIRC. I picked it up at a convention for a fraction of the original price as the molding on the bottom was flawed.
Most of the figures are from Old Glory's Trench Wars range; the Maxim teams, as well as the Jaegers are Foundry.


The 37mm infantry support guns can be used to take out defensive positions. I may not use them in the actual game.
Here is then one-page QRS for the scenario. I gave the Chauchat automatic rifle a chance to jam after firing.
Bolt Action is another very simple set of rules which can be modified and tweaked - much like Hail Caesar and Black Powder. Guess I'm a fan of the "black books."

Friday, August 29, 2014

Hail Richard! Triumph at Bosworth Field

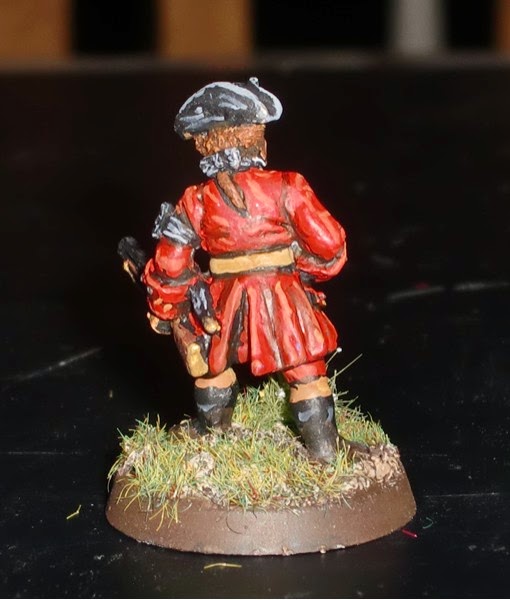
Richard III is still King of England! Thanks to buddies Scott A., Pat, Keith, and Kimo, the Bosworth game finally played out using a much-modified version of Hail Caesar. The usurper, Henry Tudor (played by Pat) and the Earl of Oxford (played by Keith) were defeated by the forces of Richard and the Duke of Norfolk (played by Kimo), and the loyal support of the Stanleys (played by Scott A.). Now Pat rolling two Blunders in the 6 Turn game did not help the Tudor cause. And to be fair, the so-called Welsh Milksop fought courageously - even charging the Yorkists forces on Ambion Hill.
Turn 2 has the Yorkists cautiously moving down the slopes of Ambion Hill. The forces of the Duke of Norfolk in the center, and Richard's cavalry on their left. The Earl of Northumberland still remains on the Hill. He would soon leave the field, causing the Stanleys to join the forces of Richard (see below mechanics for this odd behavior)
Kimo being a prudent commander did not have the Duke of Norfolk charge down Ambion Hill into the forces of the Earl of Oxford - as it was done in history. This caused the Tudor forces to advance toward the defensive position of the Yorkist. Turn 3 had Northumberland leave the field, causing the Stanleys to join Richard. In retrospect, it may be more appropriate to have the Stanleys join Henry if Northumberland were to leave the field.
The Earl of Oxford's battle moving toward Ambion Hill - after taking some casualties from Yorkists missile fire.
 Henry, aware of the Stanleys siding with Richard, decided to mount an attack on the Yorkists on Ambion Hill.
Henry and his cavalry charge into Norfolk's battle - no milksop here. Richard and his mounted forces are on Henry's right - on the move to flank Henry's forces.
The Stanleys advancing in support of Richard - skirting around the dreaded marsh.
Oxford's battle at the base of Ambion Hill - attempting to engage Norfolk.
Top of Turn 6 had Pat rolling another Blunder and subsequently having Henry turning and fleeing; ending Henry's bid for the Crown of England.
A gratuitous shot of the missile troops killed off in battle - lining the River Styx.
The general mechanics for this game worked to my satisfaction - as I was confident they would as they were pretty much the same for the successful Siege of Haengju game. The victory conditions were simple enough - death of either Richard or Henry by Turn 6. However, the added element of the Stanleys loyalty/disloyalty toward Richard could be improved. The rules for the Stanleys used in this game are below:
* If Richard advances, Northumberland rolls 1D6:
1-3 = Northumberland quits the field
4-6 = Northumberland remains in place
* If Northumberland quits the field, the Stanleys will join Richard and attack Henry (this is what happened in the game)
* If Northumberland remains in place, after King Richard commits any part of his battle, then the Stanleys roll 1D6:
1-2 = Stanleys attack Henry
3-6 = Stanleys attack Richard
* If Richard can avoid committing his main battle, i.e. defeat Henry with just Norfolk’s battle, then Northumberland remains in place well to the rear, and the Stanleys also remain in place.
For what it's worth, here are the rules used for the game - of course, there was some tweaking during the game. One being the use of commanders in combat - pretty much a combination of Hail Caesar and WAB rules. They couldn't be targeted by missile fire, but could engage in Combat with attendant peril.
These core rules can easily be modified (as they were in the first place) or given more detail to add flavor and depth as desired. That all said, I intend to put this on the back-burner for a bit as I need to prepare for Muskets and Tomahawks game I'm hosting at a game day in a few weeks.

Wednesday, August 27, 2014

Retreat from Moscow Playtest at Bruce M.'s

Taking advantage of an invite to participate in longtime gamer Bruce M.'s Retreat from Moscow playtest, I took off early from work and headed over to his palatial residence in the affluent Gig Harbor neck of the woods. Being with the hobby since time immemorial, Bruce has an extensive collection of figures, terrain and interesting artifacts. Bruce is no mean painter either and the figures for the game were mostly his. The rules which Bruce concocted are as always very interesting and fun to play. The combat (or melee as he likes to call it) is decided by D6's per figure after modifications. After rolling, the dice are lined up from highest to lowest, and then both sides compare scores - highest defeating lowest to determine casualties.
French starting their movement towards Paris
The victory conditions were the French getting off the far side of the table using the road. The Russians (which I sided with) scored, or lost points, by either capturing or killing French - including the capture of wagons/sledges. The Russians could also steal captured items/prisoners from other Russians. I tried this with my foot troops against mounted Cossacks - to my detriment.
Cossacks charging the French. Captured French were worth more than dead ones for the game. The wagons/sledges were worth the most.
This was the second playtest for the rules; although my first time playing them. They are easy enough to pick up by the second turn, yet interesting enough for a very enjoyable game. I believe Bruce plans to host this at next year's NHMGS convention, Enfilade!
French just past midway and heading into a village filled with ill-tempered peasants.
The far end of the table for the French. This was the side I was positioned on with several foot units. One an Opolchenie unit with spears. They attempted to assault a handful of French in a cabin, but were completely annihilated by them. I also ran the sledge mounted cannon - which had the crew fleeing from it after being defeated by more French in melee.
I think we played about 5 or 6 turns and called it a slight Russian victory, as most of the French had been either killed, captured or pretty well surrounded by Russians. This was all after another unit of Russians I ran were decimated by Cossack cavalry, after I had impetuously tried to steal the carriage they had captured.

It was a great mid-week diversion, and gave me an excuse to leave work early. It was also nice to see Bruce's collection again.
Bruce's game room and part of his extensive collection. In the far right corner of the photo is his Company B display table which he takes to conventions.
The Bosworth game is still a go for this Friday. It'll be interesting to see how it plays out using the "loyalty" mechanism.

Saturday, August 23, 2014

Battle of Bosworth (Redemore) Field - Playtest Set-Up

Finally got around to setting up a playtest for the Bosworth Field game. The large hill previously used in the Imjin War (Siege of Haengju) game was quartered and two parts used to replicate Ambion Hill. King Richard III is at the top of the hill, with the Duke of Norfolk in the lead battle; and just the command stand for Northumberland in the rear.
Facing Richard's forces are the Earl of Oxford and Henry Tudor. The earl's forces are those nearest in the photo above; all on foot. In the distance - equally spaced away from both Richard and Henry - is the Stanley contingent. A marshy area is located to Henry's right.
Ambion Hill.
The forces of Henry Tudor below Ambion Hill. The Earl of Oxford to his left. Their forces comprised of English, Welsh, Scots and French mercenaries.
The substantial Stanley force. Their participation for either side unknown at the start of the battle.
View from the top of Ambion Hill looking directly towards Henry and Oxford; the Earl of Northumberland rearmost.
View from Ambion Hill looking towards the northwest - Henry Tudor, the Stanleys and the marsh in the distance.
Oxford's forces, with Henry and his smaller contingent to their right.

The actual playtest will be in a few days, as my buddies have other commitments this weekend. No problem, as I just set this up late last night and this morning. The rules will be a modified/simplified version of Hail Caesar - same core rules as those used for the Imjin War game, but with special rules for particular troop types in this game. The mechanics for getting the Stanleys involved will be based upon the suggestions made in this TMP post by one "Daffy Doug" (excerpt below):

"The earl of Northumberland's command may be left off-table to the king's rear (saves having to use figures that way if you're short.) What he does is key to what follows. When king Richard commits the main battle, Northumberland will make a test to see if he stays put or rides off the field. You can make this a 50/50, heads he rides off the field, tails he stays put.
If by some method king Richard can avoid committing his main battle, i.e. defeat Henry Tudor with just his van battle, then Northumberland remains in place well to the rear, and the Stanleys also remain in place.
But if Northumberland quits the field, when Richard commits his main battle, the Stanleys will join the king's army and attack Henry Tudor.
But if Northumberland remains in place, after king Richard commits any part of his main battle or reserve, then the Stanleys roll 1d6: 1,2 = they join the king's army and attack Henry Tudor; 3,4 = Stanleys remain in place; 5,6 = Stanleys attack king Richard…."

I've seen other mechanics for this battle, but I like this one as it doesn't require troops for Northumberland :)!

More to follow. BTW, apologies for not visiting fellow-blogger sites as I was away from computers for much of this past week. I plan to catch up on your blogs as soon as this is posted.  Loyaulté me Lie!

Saturday, August 16, 2014

Redoubt F&IW French Marines

Thanks to good weather once again, the Minwax dried in record time - allowing me to finish these six Redoubt French Marines.
I really like these figures - they are well-detailed, but not overly complicated to paint. They are also very robust and make for good skirmish gaming figures.
A bit of highlighting was added after the Minwax stain/wash. The faces were given a bit of color also. Being in marching order, without their coats, they show their blue underclothes to good effect.

Here is a comparison shot with Redoubt, Foundry and Front Rank. Surprisingly (to me anyway), Front Rank are a bit smaller than both Redoubt and Foundry. Admittedly, the Foundry SYW range of British and French are noticeably larger than their other ranges (including others in the SYW range).
That all said, I like the larger size of these figures for skirmish gaming. Speaking of which, a play test using a modified version of Muskets and Tomahawks is in the near future.

Redoubt F&IW French Marines - WIP

A small unit of  French Marines which were ordered along with the Highlander Grenadiers from Redoubt Enterprises. These are nice figures, as are the Highlanders. They are sized on the larger side of 28mm and a good match for the Foundry SYW figures. They've been given the usual Minwax Tudor Satin stain treatment over a basic block paint job.
The figures prior to the stain/wash. They are sans greatcoats and in marching order with native style leggings.
Once the stain is dried, they'll be sprayed with Testors Dullcote and given some highlighting.

Saturday, August 9, 2014

78th Fraser Highlanders

Finished the Redoubt figures - painted up as 78th Fraser Highland Grenadiers.
Thanks to a very sunny day, the Minwax dried in record time. After spraying with Testors Dullcote, some highlighting was added to the coats; and stripes were added to the pattern.
They'll be part of the force commanded by General Wolfe, along with grenadiers from the 22nd, 40th and 45th Regiments, as well as Rangers.
 
Incidentally, I met the Honorary Major for the Fraser's (Vancouver, B.C. group) last year at a convention. He was a wealth of information on the regiment. The tartan he's wearing is the clan sett, which may or may not have been worn during the French and Indian War. I chose the Government pattern as the clan one would be lost with the red coat.
A small unit of French Marines, also from Redoubt, are next in the paint queue.

Redoubt F&IW Highland Grenadiers - WIP + 1

Finished the block painting and gave them a wash of Minwax Tudor Satin stain.

Today's a good day for the stain, as the temp should be pretty high and speed up the drying process.
Here's what they looked like prior to the staining. The blue doesn't look so light  to the naked eye, and helps their look on the table top.
Now I'm off to see some gaming buddies at the Game Matrix who are starting the Medieval WAB Campaign to catch up with the rest of us.

Friday, August 8, 2014

Redoubt F&IW Highland Grenadiers - WIP

Started on these guys today - just got them in the mail yesterday - only about two weeks since placing the order. So far only the flesh, musket, bearskin and plaid have been painted. They'll be a unit of 78th Fraser Highlanders for Muskets and Tomahawks. In fact, Redoubt Enterprises has been kind enough to create a pack of six figures of three different poses for these rules.
The camera flash lightened the plaid a bit; and will be darkened after receiving a Minwax stain treatment once the rest of the painting is done.
The Fraser Highlanders participated in most of the major campaigns and battles during the French and Indian War - under General Wolfe's command at Louisbourg and the Plains of Abraham.

Sunday, August 3, 2014

General James Wolfe - Front Rank Mini

Finally managed to pick up a brush today - for a couple of hours. This is a Front Rank figure of General James Wolfe - a hero of the French and Indian War. He was quite a driven individual which belied his slight physical stature and not too robust health. The figure is nicely detailed, but in typical Front Rank fashion a bit more stocky looking than the character it portrays.
The young general is in a simple uniform taken from a famous painting of him. He's wearing a black arm band in remembrance of his recently deceased father, also a famous general.
He was a fighting general who one could argue was out for glory - often at the expense of the men under his command. However, his bravery on the battlefield cannot be understated. He led several daring assaults at the Siege of Louisbourg, where he commanded units of Grenadiers, Highlanders and Rangers. He, of course, soon thereafter met his fate at the Battle of  the Plains of Abraham - famously recreated on canvas by Benjamin West.
As in the painting, he is shown with a musket, as opposed to a sword which was more typical of some ranking officers.
Here is an image of the painting which the uniform colors are based upon. Thanks to Doug Hamm (blogger Dots of Paint) who threw in this figure for free when I bought some of his F&IW Front Rank lead a while back.

Saturday, August 2, 2014

WAB Medieval Campaign - First Round

Although we didn't get a very large showing today at the Game Matrix, we went ahead and kicked off a WAB Medieval Campaign being GM'd by Pat L. (aka Socal Warhammer). My Early-HRE army went against Old Bob's Normans. Our game ended in a tie - although I ended up with more points, there wasn't enough of a spread for a win. Our buddies Adrian and Bruce D. fought it out on the next table with their English and Crusader armies, respectively. Adrian won by a slight margin. We plan to meet again next month on the regularly scheduled NHMGS Game Day (every third Saturday of the month). The period we're using for the campaign is 900-1300 AD, or thereabouts - just no gun powder. Today, my dice rolling was not much better than usual, but it was comforting to see my opponent, as well as the other players having just as unlucky rolls. It's not just me!
The Early-HRE battle line. The infantry is now two units of spears and two units of crossbowmen. Previously there were three units of combined spears and crossbows. They performed satisfactorily enough that they will remain in these formations.
Szekeler light cavalry moving up to fire on the Norman left at the top of Turn 1. With their Nomad Cavalry Deployment rule, they were able to march move up during the initial skirmisher free movement before the first turn. They then made a normal move up to fire their bows without movement penalty due to their Expert Cavalry rule. Then they moved back a normal move with their Parthian Shot rule. They managed to do this same maneuver in all six turns. but due to mediocre dice rolls only took out a few enemy troops the entire game.
Center of the battlefield. The HRE crossbowmen held their flank, but didn't score many casualties.
The small militia bow unit did surprisingly well. They moved into the wood line and provided nice bow fire. That is, until they failed their Leadership test after taking several casualties from Norman infantry javelins.
Things got interesting on the HRE left flank. First the crossbowmen fled from a Norman cavalry charge. The charge failing brought the Norman unit close enough for a charge by the HRE knights in their turn. Prior to this, the HRE units on the left all reformed to face the Norman approach - after passing Leadership tests using the General's 9 Leadership.
Thanks to the Normans' counter charge response, the HRE knights were able to just make contact. They have a limited 12" charge range due to their encumbrance of barding. The HRE general going first took out a couple of Normans, followed by another Norman casualty from the rest of the attacks. The Normans failed to cause any damage to the well protected HRE knights. Interestingly - both the Norman and HRE warhorses forgot to use their attacks! The First Charge rule auto-broke the Normans. However, again due to encumbrance, the HRE knights couldn't overtake the fleeing Normans. In fact, the 2D6" move only got them 4" up - just enough for the other Norman cav unit to make a flank attack in their next turn.
The next turn had the other (non-fleeing) Norman cavalry hit the HRE knights in their flank. Although the HRE only had two attacks back to the Norman six, only one casualty resulted. Yet this was enough for a loss and auto-break themselves. Both the earlier fleeing Normans and the HRE knights both passed their subsequent Leadership tests and returned to the fight. By Turn 6, the Normans decided not to charge the HRE knights facing them and thus ended the game a close tie. Both armies returned whence they came to lick their wounds and hopefully come up with more dynamic tactics the next time they meet. In fact, thanks to the campaign generator, the Normans can add another 65 points and the HRE army can add a light bolt thrower.

Meanwhile, the English - longbow heavy - are taking on an army of Crusaders with Saracen allies.